
Some stuff for preparing:
Download the adt (android developer tools) here and extract to some folder. For example, in F:\ like this

Open the folder containing adb.exe, for example: F:\adt-bundle-windows-x86-20130729\sdk\platform-tools

Copy the path F:\adt-bundle-windows-x86-20130729\sdk\platform-tools and set environment variable as the following: right click Computer - Properties

Choose Advanced system settings in the left pane

Click the button Environment variable:

Choose path and click Edit

Go to the end of the line, append the semi colon (;) and paste the path copied

Click OK - OK - OK to close all windows of System properties.
The emulator of adt is too slow, so you should use android emulator with virtualbox (my recommendation), download Android 4.3 here
Your computer should be installed Oracle Virtualbox, if not yet, download here
Open Virtualbox, now create android emulator like these step:
Click New to create new virtual machine

Name and choose the OS type like this:

Choose RAM for android is 768MB

Next - choose Do not add a virtual hard drive

A warning dialog appears and choose Continue

The new OS named Android43 is created
Click Settings to configure to run the .iso file

Choose Storage - Empty

Choose the disc icon to browse to the path of .iso file


Click OK to close Settings Dialog
Click Start to run Android now


In virtualbox, choose Machine menu, Disable Mouse Integration


Start

Skip


Finish


In the Android screen. Press Alt - F1 to switch into terminal

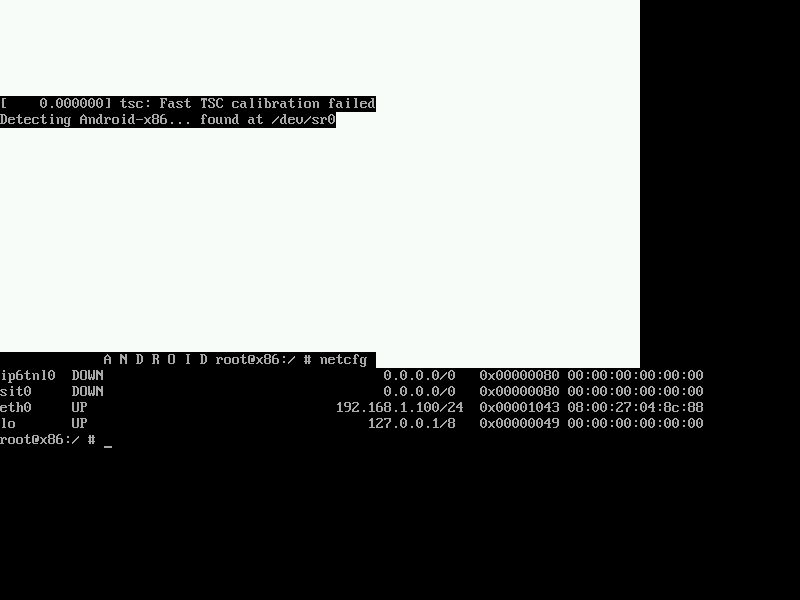
Now you have the ip address 192.168.1.100, you can connect from adt using adb.exe
Press Alt - F7 to switch into android screen again

Now you can create the first android application for example: Hello World and run on virtualbox
Open eclipse.exe in adt folder

In Eclipse, create new project by choosing File - New - Android Application Project

Name of the project and package like this

Click Next and uncheck Create custom launcher icon

Click Next


Click Next and edit class name and xml file name like this

Click Finish and you see like this

Right click and choose Change Layout like this

Choose LinearLayout (vertical)

OK
Delete the TextView Hello World in design mode, and design with an EditText (Plain Text), a Button, a TextView like this

And switch into activity_first.xml and edit some ids and names like this

Open FirstActivity class in ttaiit.tutor.app package

Right click HelloWorld project and choose Build Project to generate R.class

Edit the FirstActivity class like this code
Right click HelloWorld project - choose Debug As - Android Applicationpackage ttaiit.tutor.app;import android.os.Bundle;import android.app.Activity;import android.view.Menu;import android.view.View;import android.view.View.OnClickListener;import android.widget.Button;import android.widget.EditText;import android.widget.TextView;public class FirstActivity extends Activity implements OnClickListener {EditText et;Button b;TextView tv;@Overrideprotected void onCreate(Bundle savedInstanceState) {super.onCreate(savedInstanceState);setContentView(R.layout.activity_first);et=(EditText) findViewById(R.id.etName);b=(Button) findViewById(R.id.bSay);tv=(TextView)findViewById(R.id.tvName);b.setOnClickListener(this);}@Overridepublic boolean onCreateOptionsMenu(Menu menu) {// Inflate the menu; this adds items to the action bar if it is present.getMenuInflater().inflate(R.menu.first, menu);return true;}@Overridepublic void onClick(View arg0) {// TODO Auto-generated method stubtv.setText("Hello, "+et.getText());}}

if the dialog appears, choose No

The dialog appears, choose Cancel

And now, you have the .apk file in the bin folder of the project

Now connect with adb and run .apk file:
Start - Run - Cmd

Change directory to the bin folder


In the bin folder create new file by right click - New - Text Document

Rename it r.bat

Edit it - right click - Edit (with notepad)

append commands like this
adb install -r HelloWorld.apkadb shell am start -n ttaiit.tutor.app/.FirstActivity

Save and switch into cmd
run r.bat

Switch to virtualbox to verify installing .apk file

Choose Agree
And now you can see the result


0 comments:
Post a Comment