Tuesday, January 27, 2015

[Tutorial] Cocos2d-x: Box2D - another physics library of cocos2d-x (Part 2)

Filled under: ,

In previous part, we studied about Box2D, and build a small app using physics Box2D. In this lesson, we come to advanced a bit, control the ball, make it collide with the screen với màn hình as follow:

+ Make the ball move by vector + force
+ Predict the direction the ball moves

Step 1 - Make the ball move by vector + force

* Open file HelloWorldScene.h, in Public area, add the following code block:

// You can see the meanings of variables in the below block
bool existBall;
float ballX;
float ballY;   
int dragOffsetStartX;
int dragOffsetEndX;
int dragOffsetStartY;
int dragOffsetEndY;   
float powerMultiplier; // Force
Sprite *points[32];
void defineBall(); // Create the ball follow Box2D

// Simulate the path
void simulateTrajectory(b2Vec2 coord);

// Catch the touch events 
bool onTouchBegan(Touch* touch, Event* event);
void onTouchMoved(Touch* touch, Event* event);
void onTouchEnded(Touch* touch, Event* event);

* Open file HelloWorldScene.cpp, Delete all old code but these:

if ( !Layer::init() )
{
return false;
}

Size visibleSize = Director::getInstance()->getVisibleSize();
Point origin = Director::getInstance()->getVisibleOrigin();

// Delete all here
return true;


+ Add the following code block into the deleted place:

b2Vec2 gravity = b2Vec2(0.0f, -10.0f); // Vector of acceleration
world = new b2World(gravity);  // Create world

// Create the ball, save the coordinate of the beginning point and end point 
 dragOffsetStartX = 0;   
dragOffsetEndX = 0;   
dragOffsetStartY = 0;   
dragOffsetEndY = 0;   
existBall= false; 

ballX = 500;
ballY = 200; 
powerMultiplier = 10; // The value of force is 10
ball =Sprite::create("ball.png");
ball->setPosition(Point(ballX,ballY));
this->addChild(ball);

// Build the frame around three sides of the screen 
addWall(visibleSize.width ,10,(visibleSize.width / 2) ,0);// Floor
addWall(10 ,visibleSize.height ,0,(visibleSize.height / 2) ); // Left
addWall(10 ,visibleSize.height ,visibleSize.width,(visibleSize.height / 2) ); // Right


// Catch the touch event
auto listener = EventListenerTouchOneByOne::create();
listener->setSwallowTouches(true);

listener->onTouchBegan = CC_CALLBACK_2(HelloWorld::onTouchBegan, this);
listener->onTouchMoved = CC_CALLBACK_2(HelloWorld::onTouchMoved, this);
listener->onTouchEnded = CC_CALLBACK_2(HelloWorld::onTouchEnded, this);

_eventDispatcher->addEventListenerWithSceneGraphPriority(listener, this);

scheduleUpdate(); // Update Scene by Time 

+ Build the function addWall as follow, like the previous part, is also building physics body by Box2D 

void HelloWorld::addWall(float w,float h,float px,float py) {

b2PolygonShape floorShape; // the floor shape

floorShape.SetAsBox(w/ SCALE_RATIO,h/ SCALE_RATIO); // square, or rectangle
b2FixtureDef floorFixture;

floorFixture.density=0;
floorFixture.friction=10;
floorFixture.restitution=0.5;
floorFixture.shape=&floorShape;

b2BodyDef floorBodyDef;
floorBodyDef.position.Set(px/ SCALE_RATIO,py/ SCALE_RATIO);

b2Body *floorBody = world->CreateBody(&floorBodyDef);
floorBody->CreateFixture(&floorFixture);

}

+ The function defineBall(), declare again to create physics body for the ball of previous part and convert it as private function

void HelloWorld::defineBall(){
bodyShape.m_radius = 45 / SCALE_RATIO;

fixtureDef.density=10;
fixtureDef.friction=0.8;
fixtureDef.restitution=0.6;
fixtureDef.shape=&bodyShape;

bodyDef.type= b2_dynamicBody;
bodyDef.userData=ball;

bodyDef.position.Set(ball->getPosition().x/SCALE_RATIO,ball->getPosition().y/SCALE_RATIO);

ballBody = world->CreateBody(&bodyDef);
ballBody->CreateFixture(&fixtureDef);
ballBody->SetGravityScale(10);
}

+ Create the function onTouchBegan

bool HelloWorld::onTouchBegan(Touch* touch, Event* event)
{
// Save the coordinate of first touch point
dragOffsetStartX = touch->getLocation().x;
dragOffsetStartY = touch->getLocation().y;

Point touchLocation = touch->getLocation(); // Get the coordinate of touch point

// Save
ballX = touchLocation.x;
ballY = touchLocation.y;

// Check if the touch point doesn't have the ball, delete body of the ball created in defineBall() function
if (existBall){       
world->DestroyBody(ballBody);
}

ball->setPosition(Point(ballX ,ballY)); // Set new position ballX ,ballY
return true;
}

+ The function onTouchEnded

void HelloWorld::onTouchEnded(Touch* touch, Event* event)
{

existBall = true;

HelloWorld::defineBall(); // Create body of the ball at the last touch point

Point touchLocation = touch->getLocation(); // Get the touch point

// Save the last touch point
dragOffsetEndX = touchLocation.x;
dragOffsetEndY = touchLocation.y;

// The distance of moving the ball 
float dragDistanceX = dragOffsetStartX - dragOffsetEndX;
float dragDistanceY = dragOffsetStartY - dragOffsetEndY;

// Create the movement of body with an unchanging velocity with direction and the size = vector with the last point, the first point, multiply with a force = 10 = powerMultiplier
ballBody->SetLinearVelocity(b2Vec2((dragDistanceX*powerMultiplier)/SCALE_RATIO,(dragDistanceY*powerMultiplier)/SCALE_RATIO));
}

+ The function onTouchMoved

void HelloWorld::onTouchMoved(Touch* touch, Event* event)
{

}

Build and run. Pull the ball and release, you will see that the ball shoot out and collide with the wall of the screen.

Step 2 - Predict the direction of the movement of the ball

You need to build two functions as follow:

onTouchMoved

void HelloWorld::onTouchMoved(Touch* touch, Event* event)
{
Point touchLocation = touch->getLocation();

// Save the last point
dragOffsetEndX = touchLocation.x;
dragOffsetEndY = touchLocation.y;

// The distance of the movement of the ball
float dragDistanceX = dragOffsetStartX - dragOffsetEndX;
float dragDistanceY = dragOffsetStartY - dragOffsetEndY;

// Call the function to simulate the path of the ball, vector multiply with a force = 10 = powerMultiplier HelloWorld::simulateTrajectory(b2Vec2((dragDistanceX * powerMultiplier)/SCALE_RATIO,(dragDistanceY * powerMultiplier)/SCALE_RATIO));
}

simulateTrajectory

void HelloWorld::simulateTrajectory(b2Vec2 coord){
//Định nghĩa physics body bóng HelloWorld::defineBall();

// Tạo chuyển động cho body với 1 vận tốc không đổi có phương và độ lớn = vector truyền vào
ballBody->SetLinearVelocity(b2Vec2(coord.x,coord.y));


// Duyệt mảng point for (int i = 1; i <= 31; i++){

//Trong hàm Step, Giá trị đối số phải bằng gia tốc 10 và powerMultiplier (=10) world->Step(deltaTime,10,10);
points[i]->setPosition(Point(ballBody->GetPosition().x*SCALE_RATIO,ballBody->GetPosition().y*SCALE_RATIO));
world->ClearForces();

world->DestroyBody(ballBody);
}

+ In init() function, add a code block

// Initialize a Sprite array including 31 points, to demon the path of the movement of the ball
for (int i = 1 ; i <= 31; i++){
points[i] =Sprite::create("dot.png");
this->addChild(points[i]);
}

Build and run. When you drag the ball, you will see the dot path to show the direction of its movement. When you release, the ball fly right the direction, it means you're successful


Done for this lesson. Conclusion, in this lesson, you know how to:

Posted By Live Blog1:19 AM

Saturday, January 24, 2015

[Tutorial] Cocos2d-x: Box2D - another physics library of cocos2d-x (Part 1)

Filled under: ,

Now, you study how to use Box2D in Cocos2d-x. By default, Cocos2d-x is installed for users to use the library of Cocos2d-x + Chipmunk, if you want to use Box2D, you must do some task to import it into the compiler.

In this lesson, you study:
+ How to setup to use Box2D
+ An example of physic, applying Box2D physic

Bắt đầu chém nào!

Step 1 - Setup to use Box2D

Because by default, Cocos2d-x forces you to use Chipmunk, so you must do some following tasks:
1/ Open file CMakeLists.txt in Project  ( using NotePad++ to display line number ). Find to line number 162, and add "Box2D" as below:

(Before)

Posted By Live Blog9:06 PM

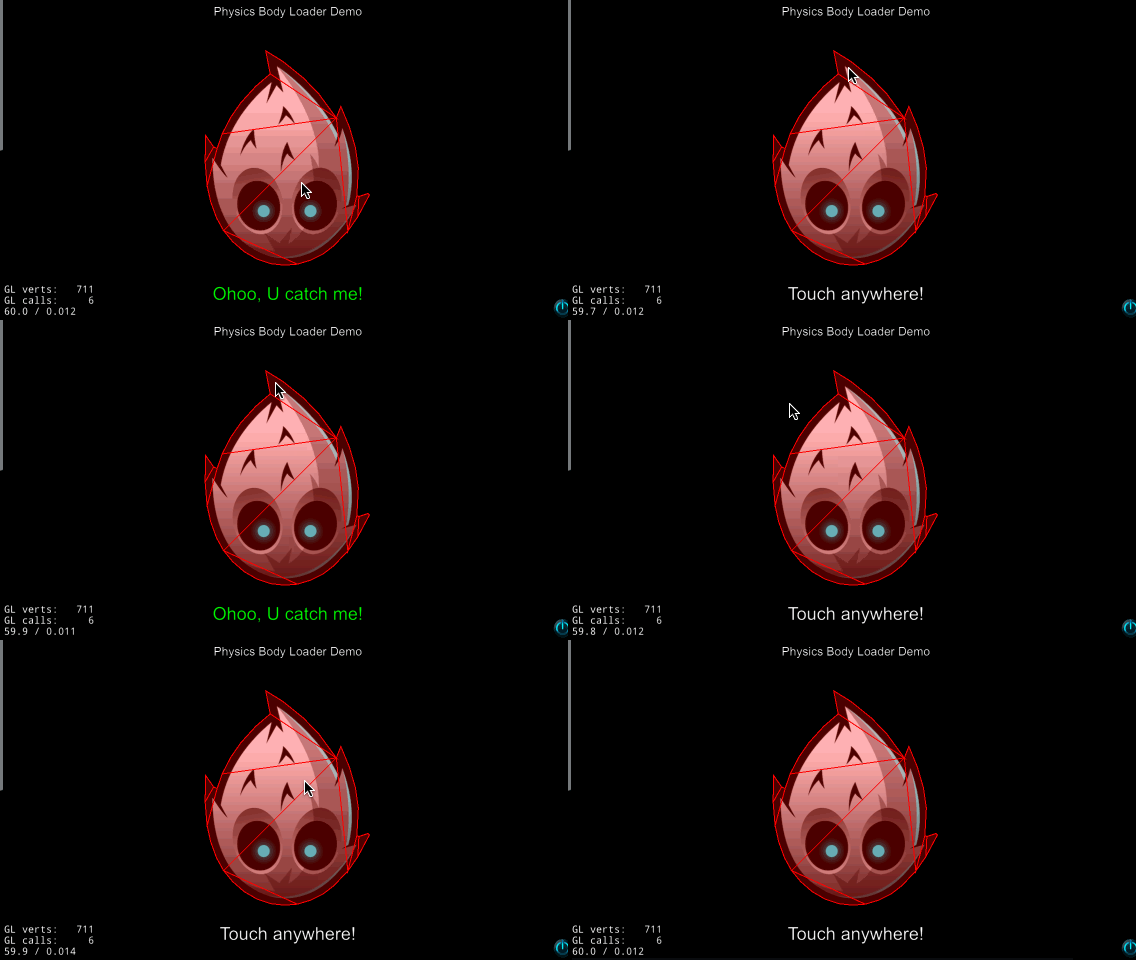
[Tutorial] Cocos2d-x: Create physics body of the complex objects by using Physical Editor software

We know how to create physics in Cocos2d-x V3.0, but in the case that is a circle, so creating physics body is rather easy. if our object has complex boundary, how do we create?

This lesson has two parts:
+ Create PhysicsBody Polygons from images by Box2d-Editor software
+ Import into game and make Physics of Engine process through analysis functions.


Part 1: Create PhysicsBody Polygons

Posted By Live Blog7:07 AM

Wednesday, January 21, 2015

[Tutorial] Cocos2d-x: Create the first simple game - Gameover, calculate scores, add sounds for game effervescent (Part 4)

In this last part, we do all remaining tasks:

+ Check game-Over when monsters collide character
+ Add sound when shooting bullets and add some background music for more attractive.
+ Here skip calculating scores. This lesson is only in simple level.

Now let's start!!!!!


Step 1 - Add sound into game

You Download resource, copy into folder Resource of Project
Then open file HelloWordScene.cpp, in function init(), add the following lines

CocosDenshion::SimpleAudioEngine::getInstance()->preloadBackgroundMusic("background-music-aac.wav");
CocosDenshion::SimpleAudioEngine::getInstance()->playBackgroundMusic("background-music-aac.wav",true); // True = unlimited loop


Find to function onTouchEnded(), add the following lines


CocosDenshion::SimpleAudioEngine::getInstance()->preloadEffect("pew-pew-lei.wav");

CocosDenshion::SimpleAudioEngine::getInstance()->playEffect("pew-pew-lei.wav");

Add a command #include"SimpleAudioEngine.h" after first "#include" .

Step 2 - Create GameOver scene

you create a new Scene named GameOverScene.h and GameOverScene.cpp like this, Download Class


Now view a bit the two files:

* Open file GameOverScene.h, declare 2 Classes GameOverLayer, and GameOverScene, with constructor, destructor, init() function.

But, you should notice the two commands:

CC_SYNTHESIZE_READONLY(cocos2d::LabelTTF*, _label, Label); (1)

CC_SYNTHESIZE_READONLY(GameOverLayer*, _layer, Layer); (2)

It's rather difficult to see, but we can see as follow:

(1) create a variable _label with type LabelTTF* through a method of Label class

(2) create a variable _layer with type GameOverLayer* tthrough a method of Layer class

It's simple like so, you can study more about function Inline here

* Open file GameOverScene.cpp, destructor (with the mark ~ ), simply release the pointers of class to release memory.

Consider function Init()
GameOverScene::init(), create a new Scene with new Layer
GameOverLayer::init(), create a layer with white color - Color4B(255,255,255,255)

Color3B create color of RGB from 3 input params. Color4B create color of RGBA from 4 input params, there the last param will adjust opacity.

This block: 

this->runAction( Sequence::create(
                                DelayTime::create(3),
                                CallFunc::create(this, 
                                callfunc_selector(GameOverLayer::gameOverDone)),
                                NULL));

is to create 2 Actions continuously
+ delay 3 seconds: DelayTime::create(3)
+ Then CallFunc::create(this, callfunc_selector(GameOverLayer::gameOverDone)), // call function gameOverDone

The function gameOverDone() do only task to replace GameOverScene by new Game Scene to continue playing

void GameOverLayer::gameOverDone()
{
    Director::getInstance()->replaceScene(HelloWorld::createScene()); // Create a new Game Scene
}


You open file HelloWordScene.cpp, find to function onContactBegin(), in the code block:

// Character that is collided by monsters
if((tag==1&tag1==2)||(tag==2&tag1==1))
 {
// process GameOver
// calculate scores
 }

Add the following code block

auto gameOverScene = GameOverScene::create(); // Create a Scene Over of GameOverScene class
gameOverScene->getLayer()->getLabel()->setString("You Lose :["); // Set a message on the screen
Director::getInstance()->replaceScene(gameOverScene); // Replace game Scene by  game Over Scene 

Remember to add "#include"GameOverScene.h" in #include lines.

Before compiling and running, you must do the following task:

+ Build Android, open file Android.mk in the path firstgame\proj.android\jni\Android.mk add this line ../../Classes/GameOverScene.cpp below the line ../../Classes/HelloWorldScene.cpp
+ Build Win32: open file firstgame.vcxproj in the path firstgame\proj.win32\firstgame.vcxproj add the two following lines:

<ClCompile Include="..\Classes\GameOverScene.h" /> below the line <ClCompile Include="..\Classes\HelloWorldScene.h" />

<ClCompile Include="..\Classes\GameOverScene.cpp"/> below the line <ClCompile Include="..\Classes\HelloWorldScene.cpp" />

Now build and run 

And ... error 

You should add USING_NS_CC; below the lines "#include" in GameOverScene.h ( each .h file should be added it ).

Done, build and run now is OK.


Posted By Live Blog7:52 AM

Monday, January 19, 2015

[Tutorial] Cocos2d-x: Create the first simple game - Discover physical collision (Part 3)

In the two previous part, we built a half of project, but the most important that need to do in this project is: kill the monsters by the bullets shot out. How to do? With previous version Engine 1.x, 2.x when building physical collision among objects is not correct, so calculation of coordinator, array, and many kinds of vectors, is very difficult. However, now in this third part, that task is very simple with only some commands. Now, let's start.

Some tasks in the third part:
+ Set physical attributes for the objects ( character, bullets and monsters )
+ Catch events that physical collisions happen.
+ Build functions to process those collision.
That's all!

Let's go!

Step 1 - Set physical attributes for objects

You open file HelloWorldScene.cpp, and do simple tasks as follow:

In function createScene(), you edit as
auto scene = Scene::createScene() thành
auto scene = Scene::createWithPhysics();
// Temporarily consider as a Scene - a zoom-out world with physical attributes contains physical objects inside.

Add the following command
// The command debug allows us to see physical body frame applying to objects ( the red border around the object)
scene->getPhysicsWorld()->setDebugDrawMask(PhysicsWorld::DEBUGDRAW_ALL);
//Set the acceleration of weight = 0, for the objects not to fall into the bottom of screen
scene->getPhysicsWorld()->setGravity(Vect(0.0f,0.0f));

1/Character

You find to the line this->addChild(player) in function init()

In that line, you add this code block:

//Create the physical body frame with circle shape
auto playerBody= PhysicsBody::createCircle(player->getContentSize().width / 2);
//Set flag = 1, to check object when collision happens
player->setTag(1);
//If you remove this command, when collision happens, nothing happens
playerBody->setContactTestBitmask(0x1);
//Set physical body into character
player->setPhysicsBody(playerBody);

2/ Monsters

You find to the line this->addChild(target); in function addTarget()

On that line, add this code block:
// Explain the same as Character part
auto targetBody = PhysicsBody::createCircle(target->getContentSize().width / 2);
target->setTag(2);
targetBody->setContactTestBitmask(0x1);
target->setPhysicsBody(targetBody);

3/ Bullet

In function onTouchEnded you find the line projectile->setPosition( Point(20, winSize.height/2) );, 

Add below that the following block, the explanation as the two above parts

auto projectileBody = PhysicsBody::createCircle(projectile->getContentSize().width / 2);
projectile->setTag(3);
projectileBody->setContactTestBitmask(0x1);
projectile->setPhysicsBody(projectileBody);

Done for building physical body.

Step 2 - Catch collision events among objects

To catch these collision events, we also create a listener to listen to collision, then pass the function to process collision through a dispatcher, as following code:

Before the line return true; of function init() add the following code block:

//Create an object to listen to collision if happenning
auto contactListener = EventListenerPhysicsContact::create();
//When collision happens, call function onContactBegin to process it, notice the line CC_CALLBACK_1, in some documents is CC_CALLBACK_2 will show the message not running.
contactListener->onContactBegin = CC_CALLBACK_1(HelloWorld::onContactBegin, this);
//the Dispatcher connects to the object that catches collision
_eventDispatcher->addEventListenerWithSceneGraphPriority(contactListener, this);

you notice the variable _eventDispatcher, this variable has two special points
+ has not declared anywhere ( even in header file HelloWorldScene.h) 
+ has the character underscore(_) at the beginning

That is the special variable available belongs to the class Dispatcher in library, so using it is completely normal. If not use, you must declare the other with the same function. Notice the variables with the underscore at beginning, usually is the variables pre-defined in class.

Step 3 - The function to process collision

In file HelloWorldScene.h add a prototype function 

//You must declare exactly ( because here is the declaration override on the parent class)
bool onContactBegin(const PhysicsContact& contact);

Then we must define that function in HelloWorldScene.cpp as follow:

bool HelloWorld::onContactBegin(const PhysicsContact& contact)
{
//Get the first collided object, casting to Sprite*
auto bullet = (Sprite*)contact.getShapeA()->getBody()->getNode();
//Get the flag value to check which object ( bullet, monsters, or character )
int tag = bullet->getTag();

//Get the second collided object, casting to Sprite*
auto target = (Sprite*)contact.getShapeB()->getBody()->getNode();
//Get the flag value to check which object ( bullet, monsters, or character )
int tag1 = target->getTag();
//If collision happens between bullet and monster, processing deletes both bullet and monster from Layer in Scene ( disappear from screen )
if((tag==2&tag1==3)||(tag==3&tag1==2))
    {

this->removeChild(bullet,true); // Delete bullet

this->removeChild(target,true); // Delete monster
}
// If collision happens between monster and character, character will die and GameOver, and then calculate scores but not process that now.
if((tag==1&tag1==2)||(tag==2&tag1==1))
        {
// process GameOver
// calculate scores
}
    return true; // must return true
}

Done, now build, run and view the result.
But there are errors, although Code is correct


Posted By Live Blog8:06 PM

[Tutorial] Cocos2d-x: Create the first simple game - Touch screen event and shoot bullets (Part 2)

In part 1, we studied how to create a character, and monsters from images through class Sprite. And in adding monsters, you notice a block calculating the appearing position, and the moving speed. It's the simple algorithm.

In this part, we do some following tasks:

+ Catch event when touching screen
+ When touching screen, our character will shoot
+ Process the direction of the bullet flying following the point when touching

Let's Start!

Step 1 - touchscreen event and how to detect

You open file HelloWorldScene.cpp, in function init() find to the end of the function before return true; add the following block:

//Create an object to dispatch event information
auto dispatcher = Director::getInstance()->getEventDispatcher();
//Create an object to listen to touchscreen event follow One by One way
auto listener1 = EventListenerTouchOneByOne::create();
//Set swallow for Touch event when happening, prevent not allow objects catching other events using this event
listener1->setSwallowTouches(true);

//Catch Touch event, when Touch event happens, call corresponding function of HelloWorld class
listener1->onTouchBegan = CC_CALLBACK_2(HelloWorld::onTouchBegan, this);
listener1->onTouchMoved = CC_CALLBACK_2(HelloWorld::onTouchMoved, this);
listener1->onTouchEnded = CC_CALLBACK_2(HelloWorld::onTouchEnded, this);

//Send to dispatcher to process
dispatcher->addEventListenerWithSceneGraphPriority(listener1, this);

return true;

* Notice: Although not using onTouchMoved, but we should make Touch event be processed completely.

Step 2 - Process touch event - create the ability to shoot bullets for character

Open file HelloWorldScene.h, add three more prototype functions:

void onTouchEnded (cocos2d::Touch* touches, cocos2d::Event* event);
void onTouchMoved (cocos2d::Touch* touches, cocos2d::Event* event);
//Notice: onTouchBegan must return bool
bool onTouchBegan (cocos2d::Touch* touches, cocos2d::Event* event);

Then open file HelloWorldScene.cpp to define these three functions.

Although we don't use all three functions, but for Touch event to process completely, you must declare all three functions as follow:


bool HelloWorld::onTouchBegan(Touch* touch, Event* event)

{  

return true; // must return True

}


void HelloWorld::onTouchMoved(Touch* touch, Event* event)
{  

// Not process here

}

void HelloWorld::onTouchEnded (Touch* touches, Event* event){
   
// Get coordinator of touch point
Point location =  touches->getLocationInView();
location = Director::getInstance()->convertToGL(location);

Size winSize = Director::getInstance()->getWinSize();

//Create a bullet as a Sprite, set first position for main character
auto projectile = Sprite::create("Projectile.png");
projectile->setPosition( Point(20, winSize.height/2) );

// This block calculates the end point of the bullet through the first position and the position on Touch, the below picture can demonstrate for this. Here apply some basic formula of math. 

// Coordinator of touch point subtract coordinator of the top of bullet (offX, offY)
int offX = location.x - projectile->getPosition().x;
int offY = location.y - projectile->getPosition().y;

// Not allow to shoot reversely and shoot straightly to the bottom ( below the character )

if (offX <= 0) return;

// If the above condition is satisfied, create the shape of bullet on the screen
this->addChild(projectile,1);

//Calculate the coordinator of the end point through the coordinator of the beginning point and the distance offX, offY
// The absolute coordinate realX = screen width + 1/2 bullet width, just right on flying out of screen
int realX = winSize.width  + (projectile->getContentSize().width/2); 

// The ratio between offY and offX
float ratio = (float)offY / (float)offX;

// The absolute coordinator of realY can be calculated based on realX and the above ratio + the beginning coordinator Y of the bullet ( calculate follow Talet in triangle, or follow tang of angle)

int realY = (realX * ratio) + projectile->getPosition().y; // must be: int realY = ((realX-projectile->getPosition().x) * ratio) + projectile->getPosition().y; (realX-projectile->getPosition().x is exactly the length from beginning point to end point on X axis

//The coordinator of end point
auto realDest = Point(realX, realY);

//The length of distance of bullet, calculate follow Pitago a*a = b*b + c*c, a is the subtense of square triangle
int offRealX = realX - projectile->getPosition().x;
int offRealY = realY - projectile->getPosition().y;
float length = sqrtf((offRealX * offRealX)  + (offRealY*offRealY));

// Set the velocity 480 pixels per second
float velocity = 480/1;

// The duration that bullet fly = the distance that bullet fly divide by the above velocity
float realMoveDuration = length/velocity;

// Move the bullet to end point with the time and the coordinate that calculated above. When go through the edge of the screen, it will disappear
projectile->runAction( Sequence::create(
MoveTo::create(realMoveDuration, realDest),
CallFuncN::create(CC_CALLBACK_1(HelloWorld::spriteMoveFinished,this)), NULL) );

}

The code block runAction seems to be complex but if written explicitly, it will be as follow:

//Move bullet with time and coordinator that calculated above
auto move= MoveTo::create(realMoveDuration,realDest);

//When move to the end poing, you will call the function spriteMoveFinished to remove the image of bullet, if not remove, the bullet fly out but still in the Layer, more and more, and process much more. This block will return an Action*
auto finish=CallFuncN::create(CC_CALLBACK1(HelloWorld::spriteMoveFinished,this));

//Perform in sequence two tasks, Move and then Delete
auto run = Sequence::create(move,finish,NULL);

//Perform the task of processing Sequence
projectile->runAction(run);

You should review the lesson Basic Actions of Sprite

Here is the image that demonstrate the calculation of the flying distance of bullet


Posted By Live Blog8:57 AM

[Tutorial] Cocos2d-x: Create the first simple game - Create a character (Part 1)

Now we will start making a simplest game. This game in old version here ( for Cocos2d-x V2.2.3)

Describe a bit about this game as follow: We have a main character and a lot of monsters, main character will kill monsters by shooting them. The game will calculate score simply (one monster killed provide you one point), and also have GameOver, you can insert music if need.

Let's go!

Step 1 - Create Project, add Resource images, sounds etc.

First, you must create a new Project (using cmd). Using command line on any platforms ( WIN, MAC, LINUX) are the same.

>cocos new firstgame -p com.vn.firstgame -l cpp -d E:/android/project

You need to download Resource ( image files ) and copy overwrite into Resource folder of Project firstgame. If you build for Android, you copy into Resource in folder proj.android of firstgame. Resource Here

Step 2 - Create character

It seems huge, but only add a Sprite of image into Layer. You do as follow:

1/ Main character
In function bool HelloWorld::init(), you delete all but following block

    if ( !Layer::init() )
    {
        return false;
    }
    
----Delete
----Delete

return true;

Then add before return true; the following block:
// Get the screen size
Size winSize = Director::getInstance()->getWinSize(); 
// Create a Sprite, our character
auto player = Sprite::create("Player.png");
// Set on the left of the screen
player->setPosition( Point(player->getContentSize().width/2, winSize.height/2) );
// Add into layer in the Scene game
this->addChild(player,1);
// Call function gameLogic , this function has task to create monsters with the speed one monster per second.
this->schedule( schedule_selector(HelloWorld::gameLogic), 1.0 );

2/ Create monsters

You open file HelloWorld.h and add 3 prototype functions:

void addTarget();  
void gameLogic(float dt);
void spriteMoveFinished(cocos2d::Node* sender);

Then you must declare these functions in HelloWorld.cpp as follow:

*
void HelloWorld::gameLogic(float dt)
{
    this->addTarget();
}

**

// This function creates mosnters and move them
void HelloWorld::addTarget()
{
    auto target = Sprite::create("Target.png");
    Size winSize = Director::getInstance()->getWinSize();
// This block calculates the area monsters appear in the place that not hidden out of the screen edge

    int minY = target->getContentSize().height/2;
    int maxY = winSize.height
                          -  target->getContentSize().height/2;
    int rangeY = maxY - minY;
    int actualY = ( rand() % rangeY ) + minY;
//
// Set monsters into above actualY (random)
    target->setPosition(Point(winSize.width + (target->getContentSize().width/2),actualY));
    this->addChild(target,1);

 //Calculate the speed for monsters to move
    int minDuration = (int)2.0;
    int maxDuration = (int)4.0;
    int rangeDuration = maxDuration - minDuration;
    int actualDuration = ( rand() % rangeDuration )
                                        + minDuration;
// Move monsters with the speed within actualDuration, from appearing point to Point(0,y)

auto actionMove =  MoveTo::create( (float)actualDuration, Point(0 - target->getContentSize().width/2, actualY) );

// Stop the moving of monsters when reaching the end poing
 auto actionMoveDone =   CallFuncN::create(CC_CALLBACK_1(HelloWorld::spriteMoveFinished,this));
/
// Run 2 above Action in sequence way by following command:
 target->runAction( Sequence::create(actionMove, actionMoveDone, NULL) );
}

You can refer Sprite and basic Action commands in previous lesson.

***
void HelloWorld::spriteMoveFinished(Node* sender)
{
// This function is only to remove Target ( being Sprite) from layer of game
// Cast to pointer Sprite of a Node*
  auto sprite = (Sprite *)sender;
  this->removeChild(sprite, true);    
}

Step 3 - Run
OK, now you can build and run on Windows with following command

>cocos run -s E:/android/project/firstgame -p win32

Here is the result!


Posted By Live Blog12:15 AM

Choose an Android item